Every successful DIY project starts with the right tools and workshop tips. Whether someone is building furniture, fixing household items, or tackling weekend renovation projects, a well-equipped workspace makes the difference between frustration and satisfaction.
A great workshop doesn’t require a massive budget or endless square footage. It requires smart planning, quality essentials, and a system that keeps everything accessible. This guide covers the must-have tools, organization strategies, safety practices, and maintenance routines that transform any space into a productive DIY hub.
Table of Contents
ToggleKey Takeaways
- A cordless drill, circular saw, and jigsaw handle roughly 80% of common workshop tasks, making them essential power tool investments.
- Organize your workshop into functional zones for cutting, assembly, finishing, and storage to minimize movement and boost efficiency.
- Always wear safety glasses and hearing protection when using power tools, and inspect tools for damage before each use.
- Prevent rust by storing tools in a dry environment and applying a light coat of machine oil or paste wax to metal surfaces.
- Keep saw blades and drill bits sharp—dull tools require more force, slip more often, and produce lower-quality results.
- Apply these tools and workshop tips consistently to transform any space into a safe, productive DIY hub.
Must-Have Tools for Every Workshop
Building a functional workshop starts with selecting the right tools. These essentials form the foundation for most DIY projects.
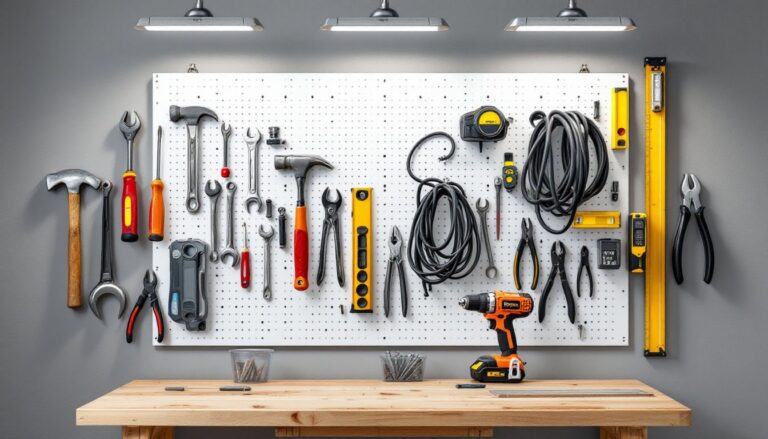
Hand Tools
A quality hammer tops the list. A 16-ounce claw hammer handles most tasks, from driving nails to light demolition. Pair it with a set of screwdrivers, both flathead and Phillips varieties in multiple sizes.
Tape measures (25-foot length works best), a utility knife, and adjustable wrenches belong in every toolkit. Pliers deserve attention too. Needle-nose pliers reach tight spaces, while locking pliers grip stubborn bolts.
Power Tools
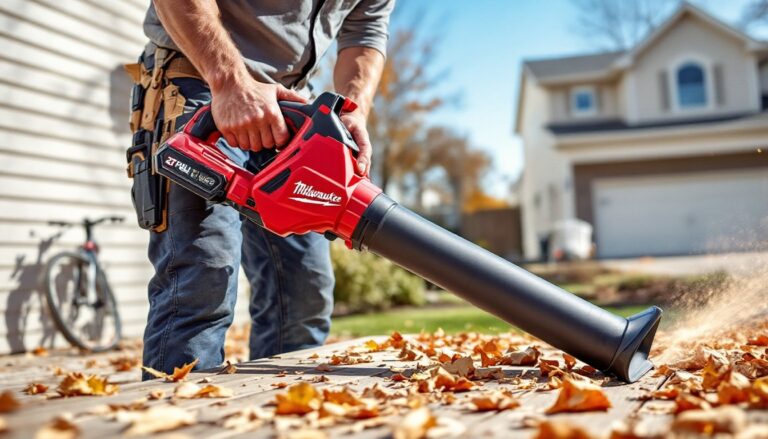
A cordless drill ranks as the most versatile power tool available. It drives screws, drills holes, and accepts various attachments. Look for models with lithium-ion batteries for longer run times.
A circular saw cuts lumber quickly and accurately. For finer work, a jigsaw handles curves and intricate shapes. These three power tools handle roughly 80% of common workshop tasks.
Measuring and Marking
Precision matters in DIY work. A speed square marks straight lines and checks 90-degree angles. A level ensures shelves hang straight and frames stay plumb. A combination square verifies both 45 and 90-degree angles.
These tools and workshop tips form the starting point. Add specialty items as specific projects demand them.
Organizing Your Workshop for Maximum Efficiency
An organized workshop saves time and reduces stress. Smart storage systems keep tools accessible and workspaces clear.
Wall-Mounted Storage
Pegboards offer flexible, visible storage for frequently used hand tools. Hang hammers, pliers, and screwdrivers within arm’s reach of the workbench. Magnetic strips hold metal tools securely and free up drawer space.
Slat walls provide another option. They accept hooks, bins, and shelves that adjust as needs change.
Workbench Setup
Position the main workbench near natural light when possible. Install task lighting directly above for detailed work. Keep a clear work surface, store tools and materials elsewhere between projects.
A sturdy workbench should stand at a comfortable height. Most DIYers prefer 34 to 36 inches, roughly waist-high for average adults.
Zone Planning
Divide the workshop into functional zones. Create separate areas for cutting, assembly, finishing, and storage. This layout minimizes movement during projects and keeps sawdust away from painting supplies.
Small Parts Storage
Clear plastic bins organize screws, nails, and hardware. Label everything. Drawer organizers sort small items by size and type. Some DIYers repurpose glass jars with lids screwed to shelf undersides, a classic space-saving trick.
Good organization represents one of the most practical tools and workshop tips anyone can carry out.
Safety Practices Every DIYer Should Follow
Workshop injuries happen fast. Proper safety habits prevent most accidents before they occur.
Personal Protective Equipment
Safety glasses protect eyes from flying debris. Wear them whenever cutting, drilling, or grinding. Hearing protection matters too, power tools generate noise levels that damage hearing over time.
Work gloves shield hands during rough tasks, but remove them around rotating machinery. Gloves can catch and pull hands into danger. A dust mask or respirator filters harmful particles when sanding or working with finishes.
Tool Safety Basics
Inspect tools before each use. Check for damaged cords, loose handles, and dull blades. Dull tools require more force and slip more often than sharp ones.
Unplug power tools before changing blades or bits. Never disable safety guards, they exist for good reasons. Keep fingers away from cutting paths, and let blades stop completely before setting tools down.
Workshop Environment
Maintain good lighting throughout the workspace. Shadows hide hazards and cause mistakes. Keep floors clean and dry. Sawdust creates slip hazards, and clutter causes trips.
A fire extinguisher belongs in every workshop. Mount it near the exit, not in a back corner. Know how to use it before an emergency happens.
First Aid Preparedness
Stock a first aid kit with bandages, antiseptic, and burn cream. Post emergency numbers visibly. Minor cuts happen, treat them immediately to prevent infection.
These safety-focused tools and workshop tips protect both beginners and experienced DIYers.
Tool Maintenance Tips to Extend Their Lifespan
Quality tools represent a significant investment. Proper care keeps them working effectively for decades.
Cleaning After Use
Wipe down tools after each project. Remove sawdust, moisture, and debris. A dry rag handles most cleanup. For stubborn residue, use a mild solvent appropriate for the tool material.
Power tools need extra attention. Clear sawdust from vents and moving parts. Compressed air blows debris from tight spaces effectively.
Rust Prevention
Moisture causes rust, and rust destroys tools. Store tools in a dry environment when possible. Apply a light coat of machine oil or paste wax to metal surfaces. Silica gel packets in toolboxes absorb excess humidity.
For tools already showing rust spots, remove the oxidation with steel wool or a wire brush. Clean thoroughly, then protect with oil.
Blade and Bit Care
Sharp blades cut cleaner and safer. Learn to sharpen hand tools or find a local sharpening service. Replace circular saw blades and drill bits when they dull, forcing dull tools damages both the tool and the workpiece.
Clean saw blades with blade cleaner to remove pitch buildup. This residue causes friction and reduces cutting efficiency.
Battery Maintenance
Cordless tool batteries last longer with proper care. Store them at room temperature, not in freezing garages or hot vehicles. Charge batteries before they drain completely. Most modern lithium-ion batteries prefer partial charges over full discharge cycles.
These maintenance-focused tools and workshop tips protect investments and ensure reliable performance.