Learning the right tools and workshop techniques transforms projects from frustrating struggles into satisfying accomplishments. Whether someone is building their first shelf or tackling advanced woodworking, the fundamentals remain the same: quality tools, proper technique, and a well-organized space.
This guide covers the essential hand tools and power tools every workshop needs, plus the techniques that separate beginners from skilled craftspeople. It also addresses workspace safety and organization, because even the best tools won’t help if they’re buried under a pile of sawdust.
Table of Contents
ToggleKey Takeaways
- Mastering workshop techniques matters more than owning many tools—skill with a few well-maintained tools beats quantity every time.
- Essential hand tools like hammers, screwdrivers, measuring tools, and clamps form the foundation of any effective workshop.
- Power tools such as cordless drills, circular saws, and random orbital sanders dramatically speed up repetitive tasks and improve efficiency.
- Accurate measuring and proper cutting stance are fundamental workshop techniques that prevent costly mistakes and improve project quality.
- A safe, organized workspace with proper tool storage, dust collection, and safety equipment makes every project easier and protects your health.
- Always progress through sanding grits (80, 120, 180, 220) without skipping to achieve a professional finish on wood projects.
Must-Have Hand Tools for Your Workshop
Hand tools form the foundation of any workshop. They require no electricity, rarely break, and offer control that power tools simply can’t match.
Hammers and Mallets
A 16-ounce claw hammer handles most general tasks. A rubber mallet comes in handy for assembly work where metal would damage the material. These two tools cover about 90% of striking needs.
Screwdrivers
A set of Phillips and flathead screwdrivers in multiple sizes is non-negotiable. Many craftspeople also keep a multi-bit driver nearby for quick changes. Magnetic tips save time and frustration when working in tight spaces.
Measuring and Marking Tools
Precision starts here. A 25-foot tape measure, combination square, and marking pencils belong in every workshop. Add a speed square for checking 90-degree angles and marking cut lines on lumber. The old saying holds true: measure twice, cut once.
Cutting Tools
A quality handsaw still earns its place in modern workshops. Crosscut saws handle cuts across the grain, while rip saws work with the grain. A set of sharp chisels rounds out the cutting tools, perfect for joints and detail work.
Clamps
Most people underestimate how many clamps they need. Bar clamps, C-clamps, and spring clamps each serve different purposes. Start with at least four bar clamps and add more as projects demand. Glue-ups become much easier with enough clamping pressure.
Power Tools That Improve Efficiency
Power tools speed up repetitive tasks and handle jobs that would exhaust anyone using hand tools alone. Choosing the right ones depends on the type of work planned.
Drill/Driver
A cordless drill/driver tops the list of essential power tools. It drills holes, drives screws, and handles countless other tasks. Look for a model with at least 18 volts and a brushless motor for longer battery life. Two batteries ensure one is always charged.
Circular Saw
This tool makes straight cuts in plywood, lumber, and other sheet goods. A 7¼-inch blade size offers versatility for most projects. Paired with a straight edge or track, it produces cuts nearly as clean as a table saw.
Jigsaw
Curved cuts require a jigsaw. It excels at cutting shapes, notches, and interior openings. Variable speed control helps match the blade movement to different materials.
Random Orbital Sander
Hand sanding takes forever. A random orbital sander smooths surfaces quickly without leaving swirl marks. It’s the finishing tool that makes projects look professional.
Router
Once someone advances past basic projects, a router opens up new possibilities. It creates decorative edges, cuts dadoes and rabbets, and handles joinery. A fixed-base router suits beginners, while a plunge router offers more versatility.
Workshop techniques matter more than tool quantity. Someone with five well-maintained tools and solid skills outperforms a person with fifty tools and no technique.
Fundamental Workshop Techniques to Master
Tools only perform as well as the person using them. These workshop techniques separate quality work from mediocre results.
Accurate Measuring
Most mistakes happen before any cutting begins. Consistent measuring technique prevents errors. Always use the same reference edge when marking multiple pieces. Hook the tape measure firmly or burn an inch (start at the 1-inch mark instead of the hook) for greater accuracy.
Proper Cutting Stance
Body position affects cut quality. Stand with feet shoulder-width apart, weight balanced. Let the tool do the work rather than forcing it. Rushing causes crooked cuts and increases injury risk.
Grain Reading
Wood has direction. Planing or chiseling against the grain tears fibers and creates rough surfaces. Learning to read grain direction takes practice but dramatically improves results. Look at the edge of a board, the fibers angle like shingles on a roof.
Joinery Basics
Strong projects depend on solid joints. Butt joints work for simple builds. Pocket screws offer speed. Mortise and tenon joints provide maximum strength. Each type of joinery fits specific applications.
Finishing Preparation
Sanding progresses through grits: 80, 120, 180, then 220 for most wood species. Skipping grits leaves scratches visible under stain or finish. Wipe the surface with a tack cloth between sanding stages to remove dust.
These workshop techniques apply whether someone uses hand tools or power tools. Master them, and every project improves.
Setting Up a Safe and Organized Workspace
A well-organized workshop makes work easier and safer. Poor organization wastes time and creates hazards.
Workbench Placement
Position the primary workbench where natural light falls across the work surface. Overhead lighting supplements daylight. Leave clearance around the bench for maneuvering long boards and panels.
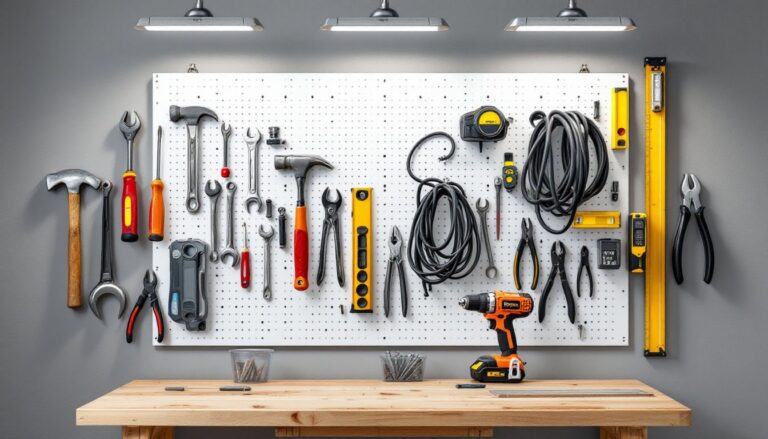
Tool Storage
Hand tools belong within arm’s reach of the workbench. Pegboard, wall-mounted holders, and drawer organizers keep tools visible and accessible. Power tools need dedicated shelf space or cabinet storage to protect them from dust.
Dust Collection
Wood dust causes respiratory problems over time. At minimum, a shop vacuum with a fine-particle filter captures dust at the source. Larger workshops benefit from a dedicated dust collection system connected to stationary tools.
Safety Equipment
Every workshop needs safety glasses, hearing protection, and a dust mask or respirator. Keep a first aid kit stocked and visible. A fire extinguisher rated for wood, electrical, and flammable liquid fires belongs near the exit.
Floor Space Management
Clear floors prevent tripping. Store lumber vertically or on overhead racks. Mobile bases on stationary tools allow reconfiguring the space for different projects. Extension cords should run along walls, not across walking paths.
Electrical Considerations
Power tools draw significant current. Dedicated circuits prevent breakers from tripping mid-cut. Ground fault circuit interrupters (GFCIs) protect against electrical shock in workshops where moisture may be present.