A well-equipped workshop transforms DIY dreams into finished projects. Whether someone is building their first workbench or upgrading an existing space, understanding how to tools and workshop setup works is the foundation of success. The right tools, proper organization, and smart safety practices make every project easier, and more enjoyable.
This guide covers the essential hand tools every workshop needs, the power tools that speed up projects, and practical tips for organizing a workspace. Readers will also find important safety guidelines to protect themselves while working. By the end, anyone can create a workshop that’s functional, efficient, and ready for any task.
Table of Contents
ToggleKey Takeaways
- A well-organized workshop with essential hand tools and power tools forms the foundation for successful DIY projects.
- Start your tool collection with versatile essentials like a cordless drill/driver, circular saw, and quality hand tools before adding specialty equipment.
- Use wall storage systems like pegboard or French cleats to keep tools visible, accessible, and organized for maximum efficiency.
- Always wear proper protective equipment—safety glasses, hearing protection, and dust masks—to prevent common workshop injuries.
- Keep all cutting tools sharp, as dull blades require more force and significantly increase the risk of accidents.
- Position your workbench near natural light and add task lighting to improve accuracy and reduce mistakes during projects.
Essential Hand Tools for Your Workshop
Hand tools form the backbone of any workshop. They require no electricity, last for decades with proper care, and handle tasks that power tools can’t always reach.
Measuring and Marking Tools
Accurate measurements prevent costly mistakes. A quality tape measure (25-foot length works for most projects) handles most jobs. A combination square checks 90-degree angles and marks straight lines. A speed square helps with quick angle measurements, especially for framing work.
Pencils, marking knives, and chalk lines round out this category. These simple tools make the difference between precise cuts and wasted materials.
Cutting and Shaping Tools
A crosscut handsaw cuts across wood grain, while a rip saw cuts along it. Many DIYers now prefer Japanese pull saws, they cut on the pull stroke, which gives better control.
Chisels shape wood, clean out joints, and handle detail work. A set of four sizes (1/4″, 1/2″, 3/4″, and 1″) covers most needs. Keep them sharp: dull chisels are dangerous and produce poor results.
Fastening Tools
Hammers drive nails. A 16-ounce claw hammer suits general work. A rubber mallet protects surfaces when assembling furniture or adjusting parts.
Screwdrivers come in flathead and Phillips varieties. A set with multiple sizes handles everything from cabinet hardware to electronics. Many people now prefer a multi-bit driver that stores tips in the handle.
Pliers grip, twist, and pull. Needle-nose pliers reach tight spaces. Locking pliers (like Vise-Grips) clamp onto stubborn bolts. Slip-joint pliers adjust to different sizes.
Adjustable wrenches complete the fastening toolkit. They turn nuts and bolts without requiring a full socket set.
Must-Have Power Tools for DIY Projects
Power tools speed up work and handle tasks that would exhaust anyone using hand tools alone. Building a workshop tool collection takes time, start with the essentials.
The Drill/Driver
A cordless drill/driver is arguably the most useful power tool. It drives screws and drills holes in wood, metal, and masonry (with the right bits). Look for an 18-volt or 20-volt model with lithium-ion batteries. Two batteries mean one charges while the other works.
An impact driver adds torque for long screws and lag bolts. Many manufacturers sell combo kits with both tools at a discount.
Saws for Every Cut
A circular saw makes straight cuts through plywood, lumber, and sheet goods. It’s portable and affordable, perfect for a growing workshop.
A jigsaw cuts curves and irregular shapes. It handles everything from cutting outlet holes in drywall to making decorative cuts in wood.
A miter saw excels at crosscuts and angle cuts. Carpenters, trim workers, and furniture makers rely on this tool daily. A 10-inch sliding compound miter saw handles most projects.
Sanding and Finishing
A random orbital sander smooths surfaces quickly without leaving swirl marks. It’s the go-to sander for most workshop projects.
A palm sander (also called a finishing sander) works well for smaller pieces and final finishing passes.
Specialty Tools Worth Adding Later
A router shapes edges and cuts grooves. A table saw makes precise rip cuts. A planer thickens boards to consistent dimensions. These tools expand what’s possible, but they can wait until basic skills develop.
Organizing Your Workshop for Maximum Efficiency
A cluttered workshop slows down projects and increases frustration. Smart organization saves time and makes work more pleasant.
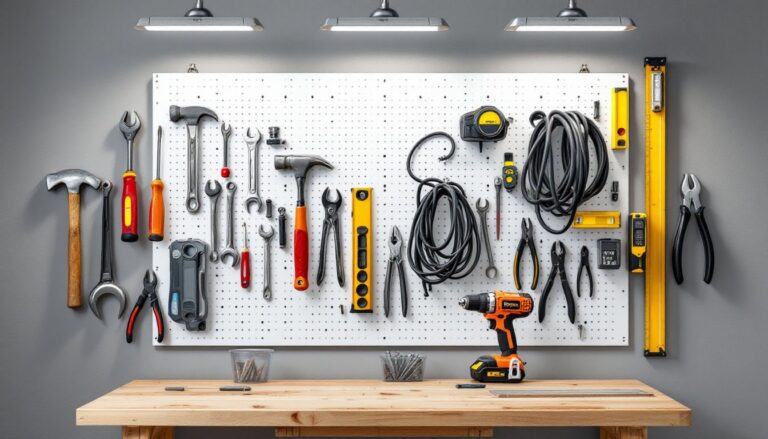
Wall Storage Systems
Pegboard remains popular because it works. Tools hang in plain sight, and hooks move easily when needs change. French cleat systems offer more flexibility for heavier items like power tools and cabinets.
Magnetic strips hold screwdrivers, wrenches, and other metal tools. They’re especially useful near a workbench where those tools get constant use.
Workbench Setup
The workbench is the heart of any workshop. Position it where natural light falls on the work surface. Add task lighting directly above for evening projects.
Keep frequently used tools within arm’s reach. A tool well or shelf along the back of the bench holds screwdrivers, squares, and pencils. Drawers underneath store items that need protection from dust.
Storage for Materials and Supplies
Lumber racks keep boards flat and organized. Build or buy a rack that holds different lengths, short pieces in front, long boards in back.
Small parts get lost easily. A parts organizer with clear drawers shows what’s inside without opening each one. Label everything.
Finishes, adhesives, and chemicals belong in a dedicated cabinet. This keeps them away from heat sources and makes inventory checks easy.
Safety Tips for Using Workshop Tools
Every year, thousands of people injure themselves in home workshops. Most accidents are preventable with proper precautions.
Personal Protective Equipment
Safety glasses protect eyes from flying debris. Wear them whenever cutting, drilling, or sanding. Regular prescription glasses don’t provide adequate protection, get proper safety glasses or goggles.
Hearing protection matters more than many people realize. Power tools create noise levels that cause permanent hearing damage over time. Foam earplugs work fine: earmuffs are even better.
A dust mask or respirator protects lungs from sawdust and finish fumes. N95 masks handle most dust. Upgrade to a respirator with cartridges when spraying finishes or working with treated lumber.
Tool-Specific Safety
Read the manual for every power tool. Manufacturers include safety information specific to that tool’s risks.
Keep blades and bits sharp. Dull tools require more force, which increases the chance of slipping.
Never remove safety guards. They exist because someone got hurt. Blade guards, riving knives, and anti-kickback pawls save fingers and faces.
Unplug tools before changing blades or making adjustments. Even with the switch off, an accidental bump could start the motor.
Workshop Environment
Good lighting prevents mistakes. Shadows hide problems and make accurate cuts difficult.
Keep floors clear of cords, scraps, and spills. Tripping while holding a power tool creates dangerous situations.
A fire extinguisher belongs in every workshop. Mount it near the exit where it’s accessible during an emergency.