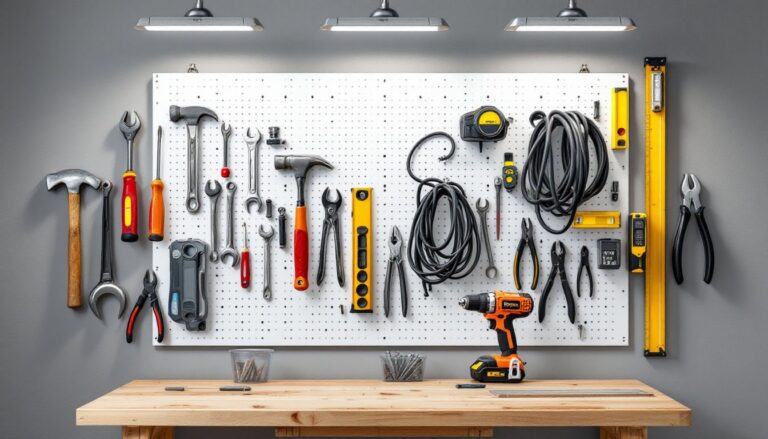
Walking into a workshop stocked with gleaming tools and organized lumber feels inspiring, until the beginner realizes they don’t know where to start. Woodworking doesn’t require a garage full of specialized machinery to produce quality work. What it does require is a small, curated toolkit that handles fundamental operations: cutting, drilling, measuring, shaping, smoothing, and clamping. These seven categories form the foundation of nearly every woodworking project, from building shelves to crafting furniture. Investing in the right tools upfront saves money, frustration, and wasted material down the line.
Table of Contents
ToggleKey Takeaways
- Must-have woodworking tools fall into seven essential categories—cutting, drilling, measuring, shaping, smoothing, and clamping—that form the foundation for nearly every project.
- Hand saws teach fundamental woodworking control and precision, with crosscut, rip, and back saws each serving distinct purposes; Japanese pull saws offer an easier alternative for beginners.
- A cordless 18V-20V drill/driver with an impact driver attachment covers most fastening and drilling tasks, making it the single most-used power tool in any workshop.
- Accurate measuring and marking with a quality tape measure, combination square, and marking knife prevents costly material waste, especially when working with expensive hardwoods.
- Sharp chisels paired with a mallet enable fine detail work and joinery that saws and sanders cannot achieve, requiring proper technique and safety practices like securing work with clamps.
- A random-orbital sander delivers professional finishes 75% faster than hand-sanding, while proper grit progression (80→120→180→220) ensures scratch-free results before applying stain or topcoat.
- An investment of $600–$900 in quality woodworking tools creates a functional shop capable of furniture and cabinetry work, with tools lasting decades when properly maintained.
Hand Saws: The Foundation of Precision Cutting
Before anyone plugs in a circular saw, they should understand how to control a hand saw. Hand saws teach the fundamentals of grain direction, cutting mechanics, and material control without the noise or risk of kickback.
A beginner’s toolkit should include three types:
- Crosscut saw: Designed to cut across wood grain. Teeth are angled to sever fibers cleanly. Ideal for cutting boards to length.
- Rip saw: Built to cut along the grain. Teeth have a chisel-like profile that removes material aggressively. Used when breaking down wider stock.
- Back saw or dovetail saw: Features a rigid spine along the top edge for controlled, precise cuts. Essential for joinery work like tenons or mitered corners.
Modern Japanese pull saws offer an alternative that many beginners find easier to control. Unlike Western push saws, pull saws cut on the backstroke, which keeps the blade under tension and reduces bending or wandering. They also produce thinner kerfs (the width of the cut), wasting less material.
When selecting a hand saw, check the teeth per inch (TPI). Lower TPI (5-8) cuts faster but rougher, suitable for rip cuts. Higher TPI (12-20) gives smoother finishes for crosscuts and detail work. A handle should feel balanced and comfortable after fifteen minutes of use, not just when picked up in the store.
Hand saws don’t require electricity, never run out of batteries, and work in tight spaces where power tools can’t fit. They’re also quieter, a real advantage in shared living spaces or apartments.
Power Drill and Driver Set: Your Versatile Workhorse
A cordless drill/driver combo is the single most-used power tool in any woodworking shop. It drills pilot holes, drives screws, sands with attachments, mixes finishes, and even buffs hardware.
Modern lithium-ion models offer enough runtime for a full day’s work on a single charge. Look for these specs:
- Voltage: 18V to 20V provides the best balance of power and weight for woodworking. Lower voltages (12V) work for light assembly but struggle with hardwoods or large bits.
- Chuck size: A ½-inch chuck accommodates larger drill bits and hole saws. 3/8-inch chucks are lighter but limit bit selection.
- Clutch settings: Adjustable torque prevents overdriving screws, which strips heads or splits wood. Most drills offer 15-20 settings plus a drill mode.
- Two-speed gearbox: Low speed (0-450 RPM) for driving screws and high speed (0-1,800 RPM) for drilling.
Buy a set that includes both a drill/driver and an impact driver. The impact driver uses rotational hammering to drive long screws without wrist strain or cam-out (when the bit slips out of the screw head). It’s indispensable for deck screws, lag bolts, or any fastener over 2 inches.
Invest in quality drill bits and driver bits separately. Twist bits in sizes 1/16″ through ½” cover most drilling needs. Brad-point bits stay centered better than standard twist bits when starting holes in wood. For driver bits, buy hex-shank sets with multiple Phillips and square-drive sizes. Magnetic bit holders keep bits from wobbling.
Always drill pilot holes in hardwood or near board ends to prevent splitting. The pilot hole diameter should match the screw’s root diameter (the solid core), not the thread diameter.
Measuring and Marking Tools: Accuracy Begins Here
Experienced woodworkers say “measure twice, cut once” for good reason. Mistakes in layout waste material and time, especially when working with hardwoods that cost $8-$15 per board foot.
Every beginner needs:
- 25-foot tape measure: Look for a standout (how far the tape extends before bending) of at least 7 feet. A ¾-inch-wide blade is easier to read and less likely to kink. Some models include fractional markings for common stud spacing (16″ and 19.2″ on-center).
- Combination square: This adjustable square checks 90° and 45° angles, measures depth, and marks lines parallel to an edge. The head slides along a 12-inch ruler and locks with a knurled knob. A quality combination square remains accurate for decades, cheap ones lose square quickly.
- Marking knife or mechanical pencil: Carpenter’s pencils are traditional but their thick lead produces wide, imprecise lines. A marking knife scores a hair-thin line that’s far more accurate, especially for joinery. Some woodworkers use 0.5mm or 0.7mm mechanical pencils for layout work that doesn’t need to withstand handling.
- Speed square: This triangular aluminum tool marks angles, guides circular saw cuts, and checks framing square quickly. It’s called a “speed” square because framers can lay out rafters without consulting tables.
- 4-foot level: Essential for any project that needs to be plumb (vertically level) or level (horizontally flat). Longer levels give more accurate readings. Magnetic edges help when working with metal hardware.
Don’t skip the marking gauge, a tool that scratches a line parallel to an edge at a set distance. It’s invaluable for laying out mortises, tenons, or rabbets with repeatable accuracy.
Chisels and Mallet: Essential for Fine Detailing
Wood chisels pare, clean, and shape in ways that saws and sanders can’t match. They refine joinery, remove waste from mortises, trim plugs and dowels flush, and undercut door casings for flooring.
A starter set should include four sizes: ¼-inch, ½-inch, ¾-inch, and 1-inch widths. This range handles most furniture and carpentry tasks. Chisels come in two styles:
- Bevel-edge chisels: The sides taper toward the cutting edge, allowing access into acute corners like dovetails. These are the most versatile for general woodworking.
- Mortise chisels: Thicker, heavier blades designed to withstand mallet blows when chopping deep mortises. Beginners can skip these initially.
Buy chisels with hardened steel (high-carbon or chrome-vanadium alloy) that holds an edge. Avoid sets under $30, the soft steel won’t stay sharp through a single project. Handles should be wood, impact-resistant plastic, or composite materials designed for mallet strikes.
A wood or rubber mallet (not a claw hammer) drives chisels without damaging handles. Mallets weigh 12-16 ounces for general work. Dead-blow mallets, filled with sand or shot, reduce bounce and deliver more force per strike.
Always cut away from your body and keep both hands behind the cutting edge. Secure work with clamps or a vise, never hold a piece in one hand while chiseling with the other. Wear safety glasses: chips fly unpredictably.
Sharp chisels are safer than dull ones because they require less force and stay on course. Learn to sharpen on whetstones or a honing guide. A chisel sharp enough to shave arm hair cleanly is sharp enough for woodworking.
Orbital Sander: Achieving Professional-Quality Finishes
Hand-sanding produces excellent results, but a random-orbital sander cuts sanding time by 75% while delivering a swirl-free finish. The “random” orbit prevents sanding patterns from appearing in the final finish.
Orbital sanders come in corded and cordless versions. Corded models deliver consistent power and never need charging, making them better for large projects like tabletops or cabinets. Cordless sanders offer mobility but may lose power as batteries drain.
Key features:
- Pad size: 5-inch pads are standard and handle most furniture work. 6-inch pads cover more area but feel less maneuverable in tight spaces.
- Variable speed: Adjustable speeds (7,000-12,000 OPM or orbits per minute) let woodworkers slow down for delicate veneers or speed up for rapid stock removal.
- Dust collection: Look for sanders with efficient dust ports. Connect a shop vacuum to capture 80-90% of dust, protecting lungs and keeping the work surface visible. Without dust collection, fine particles fill the air and settle into every crevice.
Sandpaper grits follow a progression. Start with 80-grit to remove mill marks, old finish, or rough shaping. Move to 120-grit to eliminate 80-grit scratches, then 180-grit for smoothing. Finish with 220-grit before applying stain or topcoat. Skipping grits leaves visible scratches that show up after finishing.
Never press down hard. The sander’s weight provides enough pressure, forcing it generates heat that clogs sandpaper and burnishes wood instead of cutting it. Keep the sander moving steadily to avoid creating low spots or dips.
Clamps and Vises: Securing Your Work Safely
Woodworkers joke that no one ever has enough clamps, and it’s true. Clamps hold joints during glue-up, secure workpieces during cutting or routing, and act as extra hands when working solo.
Beginners should start with:
- Bar clamps or pipe clamps: These provide long reach for gluing up panels, tabletops, or cabinet sides. Bar clamps come in fixed lengths (24″, 36″, 48″), while pipe clamps use standard ¾-inch black iron pipe cut to any length. Four 36-inch clamps handle most projects.
- Spring clamps: Quick one-handed operation makes them perfect for holding jigs, temporarily securing trim, or applying light pressure. Buy a variety pack with 2-inch, 4-inch, and 6-inch jaw capacities.
- C-clamps: Cast iron or steel frames shaped like the letter C. They apply heavy pressure in a compact footprint, ideal for laminating or face-gluing. Sizes from 4 to 8 inches cover general needs.
When gluing joints, clamp pressure should be firm but not excessive. Over-tightening squeezes out too much glue, creating a weak “starved” joint. Glue should bead out along the entire joint line, if it doesn’t, pressure is too light.
Protect wood surfaces with clamp pads (wood scraps or cork) to prevent metal jaws from denting soft woods or leaving marks. Wax clamp bars so excess glue doesn’t bond the clamp to the project.
A bench vise mounted to a workbench holds stock for hand-planing, sawing, chiseling, or routing. A 7-inch vise provides enough capacity for most work without overwhelming a small shop. Quick-release models save time when switching workpieces frequently.
Conclusion
These seven tool categories form a functional woodworking shop capable of tackling furniture, cabinetry, and finish carpentry. They represent an investment of roughly $600-$900 depending on brand choices and whether tools are purchased as a kit or individually. Quality tools last decades when maintained properly, making them far more economical than repeatedly replacing cheap versions. As skills grow, woodworkers naturally add specialty tools, routers, planers, table saws, but these essentials remain in constant use regardless of experience level.